How to take screenshot of your phone screen using adb
December 15, 2021
How to take screenshot of your phone screen using adb:
adb provides an easy way to take screenshots of an Android device. If you want to take a screenshot quickly, you need to just run this command. In this post, I will show you how to take screenshots using adb.
adb screencap:
screencap is a utility used to take screenshots. You need to connect your phone in Developer mode enabled and you need to install adb on your laptop.
Follow the following steps to run this command to take screenshots from your Android phone.
Step 1: Connect your phone and turn on the Developer option:
Connect your phone to your laptop using an USB cable. Make sure to turn on developer settings in your settings.
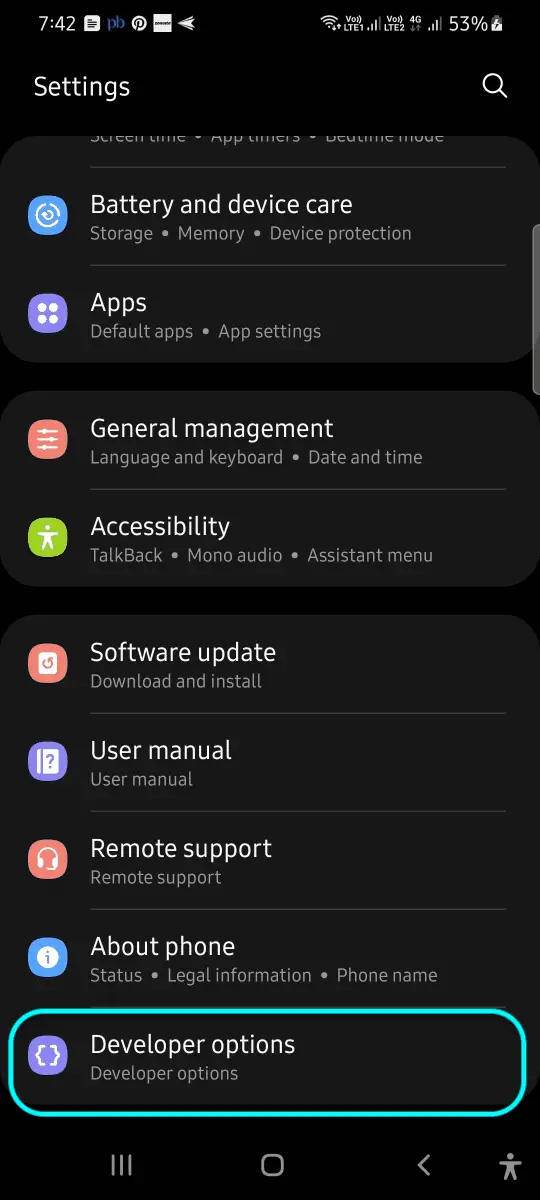
If developer options is not showing in the settings page, you have turn it on:
- Go to About phone
- Click on Software Information
- Keep tapping on the Build number. It will show you a message like 4 steps remaining, 3 steps remaining etc. Once you reach 0, it will enable developer option and show one more toast.
- Once it is enabled, go to your settings page, you will see a new option Developer options. You will find it at the bottom of the list.
Step 2: Turn Developer option and USB Debugging on:
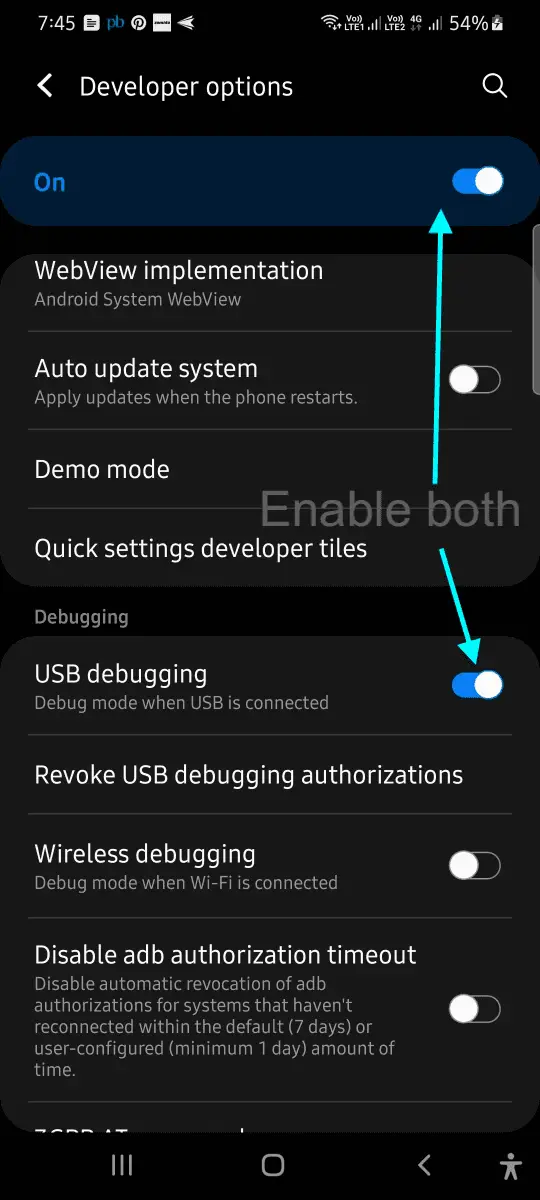
If you click on Developer option, it will show you an option to enable it. Also, enable USB Debugging.
Note that, you might not see usb debugging option if your phone is not connect to the laptop. It might show you a popup asking for permission for USB debugging. Tap allow.
Step 3: Take screenshots:
Once your phone is connected to your laptop, open a terminal window and run the below command:
adb devicesIt will show the device in a list as like below if it is connected properly:
List of devices attached
XX8X31CXPAX	device
The device id will be different for you.
Now, run the below command:
adb shell screencap -p /sdcard/test-screenshot.pngWe are using screencap to take a screenshot of the current screen and that is saved in the /sdcard folder inside the device.
Since this is stored in the device, we need to pull it to the laptop.
adb pull /sdcard/test-screenshot.pngIt will move that file to the current folder where you are in the terminal.
You can also run the below command to take a screenshot and save the file directly in your PC:
adb exec-out screencap -p > test-screenshot.pngThat’s all. screencap is a useful command and it helps to quickly take App screenshots.

